Strawberry 7-UP Pie


This is one of those desserts that goes back to my childhood!  My mom made it for us and now my sisters and I have made it for years now.  It's very refreshing and the best part is the crust and it's oh so easy!  It's a buttery shortbread crust which happens to be the same crust we use for our Chocolate Pie!  You don't even have to  roll out the crust you just blop it in the pie pan then with your hands spread it out to the edges then poke holes using a fork!

Homemade whip cream tops this off nicely!  Recipe follows (whipping cream)!  You can use cool whip but you will never use cool whip after you make your own whipping cream.  It's easy peasy and taste so much better!

Truly this is one of those pies that you will make again and again!


For the Crust


Mix flour and powder sugar


Add melted butter and mix together


Dump into the pan

then spread out with your hands to the edges of the pie plate then poke holes in the crust with a fork (on sides and the bottom of the pie crust)

Bake until golden brown 8 to 10 minutes


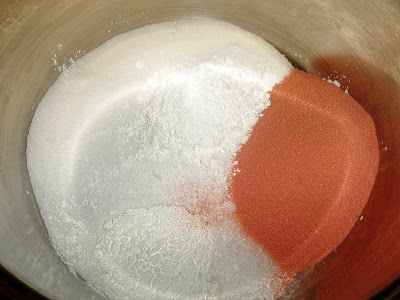
Combine sugar, jello and cornstarch or flour


add 7-up and vanilla and cook until thickens


While filling is cooking cut up a pkg of strawberries


line the cooked pie crust with strawberries


once filling has cooled pour over strawberries


Chill until it sets


Heavy cream (I just happen to have 2 cartons one was partially full)


Start out on low then turn to high...beat until you get soft peaks


it's ready!


Strawberry 7-up Pie


1 large pkg strawberries
3 T corn Starch or flour
½ cup sugar
10 oz 7-up
Small or large box strawberry jello

Combine dry ingredients pour in 7-up cook until thickens stirring often.
Let filling cool add vanilla than add strawberries (cut strawberries in half)
or you can line the bottom of the crust with strawberries and then pour
filling over strawberries covering all…


Pie Crust
1 stick butter melted
1 cup flour
2 T powder sugar

Melt butter then add flour and powder sugar mix together then pat down into pie crust poke with fork on bottom and side of crust (so that the crust doesn’t
Shrink to the bottom) .. Bake at 400 degrees for 8-10 minutes until golden brown.


Whipping Cream


1 cup heavy cream (chilled)
2 Tbsp powder sugar or granulated sugar (add more if needed)
1 tsp vanilla

In a deep mixing bowl, beat one cup heavy cream until soft
peaks form. Sprinkle sugar over cream; beat until soft peaks
return.  Do not over beat.

Makes about 2 cups

If you have time chill your bowl before hand and beaters..


Butterfinger Blondie Brownies


Ummm these are decadent or at least that is what I thought the first bite I took!  The bottom layer is like a cookie bar with crushed butterfingers throughout then it's iced with butter cream icing and sprinkled with crushed up butterfingers.  Layers of goodness throughout this delicious dessert! 

I have made these 4 times now and I think each time I am going to take pictures as I go and then I get in the middle of making it only to realize I forgot once again!  They are so easy you will have no trouble!

I made these last week at the Ronald McDonald House where I do a monthly  Kid's Cooking Class for the families staying there.  The kids were so ready to dig in because the smell is so delightful!  I let them cool in the freezer for about 10 minutes then we iced them.  The icing did melt a little bit so do let them cool for at least 30 minutes. 

Oh really if you like peanut butter you need to try these!  There is just enough chocolate for it not to be overwhelming and just enough peanut butter to let you know it's there and then all the sudden you taste that lovely butter cream icing.......heaven!

I am smelling the goodness right now in my house.  I made a batch for my bible study tonight I am going to. 


Butterfingers Blondie Brownies

Ingredients
1 cup butter
1 cup light brown sugar
1/2 cup granulated sugar
2 tsp vanilla

2 eggs
2 1/2 cups all purpose flour
1 tsp
baking soda
1 tsp coarse sea salt
2 cups coarsely chopped Butterfingers Bars (approx 16 “Fun Size” bars)

Instructions
Preheat oven to 350°
Cream butter and sugars in mixing bowl.
Add the vanilla and eggs and mix until incorporated.
On low add your dry ingredients (flour, salt and baking soda) until just combined.
Stir in your chopped Butterfingers.
Spread in a 9×13 baking dish and bake for 25 minutes until center is JUST set.
Remove from oven and cool completely.

Preparation time: 5 minute(s) Cooking
 time: 25 minute(s)

Butterfingers Buttercream:
Ingredients
1/2 cup room temp butter (1 stick)
1/2 cup vegetable
shortening
2 1/2 – 3 cups powdered sugar
1/2 cup chopped Butterfingers Bars (approx 4 “Fun Size” bars)

Instructions
Cream the butter and shortening together until smooth.
Add in you powdered sugar on low speed.  Turn speed up to medium and mix until smooth
Stir in your chopped Butterfingers. (I sprinkled mine on top rather than stirring them in!)
Spread on your cooled blondies
Preparation time: 5 minute(s)


Coconut Cake

The first bite I took of this cake I said OMG (oh my gosh)!  It is soooooo good!  My mom used to keep a Pepperidge Farm Coconut Cream Cake in the freezer in case someone came over unannounced and by George we didn't have a dessert!  This cake reminds me of the Pepperidge Farm Coconut Cream cake!  I will have to say though that my Mom pretty much made everything by scratch but if she found something good like Pepperidge Farms she would buy it for those just in case moments.  Their cake is soooo moist and so is this one, the only difference is this one is baked in a 9X13 pan and the Pepperidge Farm one is 3 layer square cake.

I honestly just had this cake for the first time about a month ago when my friend Paula made it.  Since then I have made 3 coconut cream cakes!!  Not for me or home  but for catering and other people.  This cake is so easy to make!  I have had it soon after it was made (it was at room temperature) and thought that is how I would want to serve it then I had it cold out of the fridge and I am thinking that is way delicious!  That is when I decided it reminded me of the Pepperidge Cake! 

Now the recipe calls for Cool Whip but I am Anti Cool Whip!  It takes minutes to make whipping cream and it's so much better tasting and better for you!  I have the recipe for whipping included on this post.


 Make cake according to the instructions on cake mix


This is what the can looks like for the coconut cream, you can find it on the hispanic aisles


This is what the coconut cream looks like in the can


mix the condensed milk and coconut cream together


Poke holes in cake


Then pour over cake


Takes about 10 minutes and then it will soak right in


Not sure why I took a pic of these but you just need on carton (I had a partial carton and a whole one)


Start out on low-med then turn the speed up to high


add powder sugar and vanilla and whip till you get soft peaks


Spread whipping cream onto cake then sprinkle coconut on top!


Piece of cake and oh so good!


Coconut Cake

1 French Vanilla Cake Mix (bake per instructions)
1 can Eagle Brand sweetened condensed milk
1 can cream of coconut
1 pint of whipping cream
1 cup coconut
Prepare cake according to directions on the box.  After removing cake from oven, poke holes (with the end of a wooden spoon)  all over cake.  Combine Eagle Brand milk and cream of coconut; mix well.  Pour this mixture over cake.  Let cake cool.  Spread whipping cream over cooled cake; top with coconut.  Cake MUST be kept in refrigerator.  Simple but delicious

Whipping Cream
1 cup heavy cream (chilled)
2 Tbsp to about ¼ of a cup of powder sugar or granulated sugar (add more if needed)
1 tsp vanilla


In a deep mixing bowl, beat one cup heavy cream until soft
peaks form. Sprinkle sugar over cream; beat until soft peaks
return.  Do not over beat.
Makes about 2 cups
If you have time chill your bowl before hand and beaters..

* You can beat the whipping longer for a more firm peak


Chicken Wrapped in Bacon

I have made this now a couple of times and it's super easy and very good!

 You basically just season the chicken then wrap it with either a half piece of bacon or a whole piece then roll in brown sugar!  Place it in a pan and let it cook!

I like to buy chicken breast and cut it but you could use tenders.  The problem with tenders is they always have that white tendon in them and it's so hard to get it out without messing up the tender!

You could even use a whole chicken breast and wrap it with bacon instead of thirds.... totally up to you! 

The brown sugar really gives this great flavor and honestly I didn't think of it as being sweet.  The seasonings and bacon along with the brown sugar go well together!


Sprinkle season on chicken

Wrap bacon around each piece, I cut the bacon in half but you can wrap one whole piece around and tuck it under the wrapped bacon.  If you use a half piece of bacon then I use toothpicks to hold it on.


Coat with brown sugar by just turning it around a couple of times in the sugar

You can cook it in a skillet, on the grill or in the oven.  I used a grill skillet here.


Chicken Wrapped in Bacon 

4 chicken breasts cut in thirds (12 pieces)
Bacon slices
salt and pepper to taste
lawry’s garlic salt (with green lid)
chili powder
brown sugar

Cut each breast into 3 pieces, season all the chicken with the spices, then wrap a bacon slice around each piece, roll in brown sugar and either cook in a skillet or an oven proof dish.  I cooked it both times in a skillet but thought I might try the oven next time.  The skillet works great though and only takes about 20 to 25 minutes.

 If you use the oven bake at 400 degrees for 30 to 40 minutes or until chicken is cooked through and bacon is nice and brown and crispy.